
 From Paul
Geithner's Triumph Spitfire
From Paul
Geithner's Triumph Spitfire
Links, References
& Technical Information
Upgrading
Triumph
Spitfire Wheel Studs
Because there are so many studs to choose from and it’s difficult to get stud dimensions or search for studs according to their dimensions, choosing suitable substitute studs is a real chore. One very good option that I learned about a few years ago from some fellows on an automotive forum based in the U.K. is to use Land Rover Freelander studs (part number CLP9037L). These studs are 12mm thick, 1.5mm per thread (i.e., M12x1.5) and they have the right knurled diameter (0.510-0.520 inches, or about 13.0 to 13.2 mm) so they will fit snugly and just right into Spitfire and GT6 hubs. Freelander studs are 2 inches long, 1.3 inches of which is threaded, versus the stock Spitfire and GT6 studs that are 1.5 inches long, 7/8 inch of which is threaded (1/8 inch on the end is an unthreaded “easy start” shoulder). The comparison photo below clearly illustrates the dramatic difference..

One particularly good thing about these Freelander studs is that they
have the same beveled/chamfered head shape and 5/8 inch head diameter
as the Spitfire and GT6 studs. They are a perfect fit and will
not cause any interference problems with the rear brake slave
cylinders. However, in early 2010 a friend of mine bought some
Freelander studs that came with the more common square-edged head shape
found on many other studs:

My
friend contacted Land Rover to inquire about the different head shape,
and he was told they’ve changed suppliers (and apparently the
specs for head shape too). If you receive a batch of these
square-edged studs, then it’s possible to machine a chamfer
to the underside of the head, even if you don’t have a
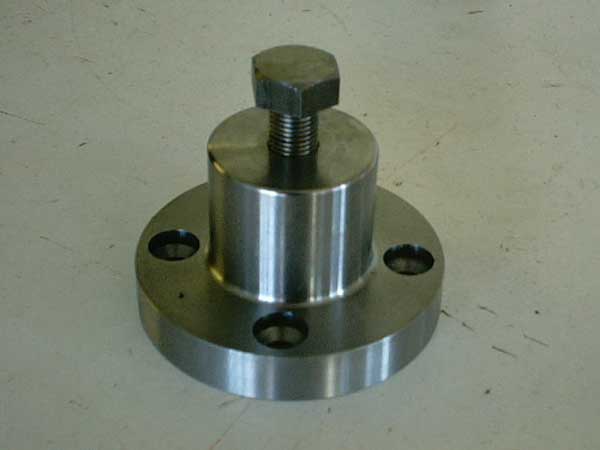
lathe. One method is to carefully but firmly chuck each stud
into a drill press (being careful not to damage the threads) and spin
it while you carefully grind away a beveled edge with a grinder,
Dremel tool or file:

It’s a good idea to machine this chamfer into the heads of
the studs so as to avoid possible interference that can occur between
the stud heads on the backside of the rear hubs and the rear slave
brake cylinders as the wheels turn.
These Freelander studs should work fine with any alloy wheels on a
Spitfire or GT6. However, if you find the studs to be too long
for your application, like if you’re using closed-end lug
nuts and they bottom-out on the ends of the studs before they seat on
the wheel (possible with thin center section steel wheels but very
unlikely with alloy wheels), there are some simple
options. These include drilling-out the blind hole in each
closed-end lug nut a little bit more, using open-ended lug nuts or just
shortening the threaded ends of the studs a little bit before
installing them. Also, because the shoulder of the Freelander studs is
a bit longer than the stock studs, there will be about 1/16 inch of it
exposed through the front hubs and rear drums (see photos
below). If using steel wheels or alloy wheels with mag lug
nuts, check to see that the nuts seat all the way. There shouldn't be a
problem, but if there is, then drill-out the first 2mm of thread in the
nuts. With alloy wheels that use cone-seat (i.e., acorn) nuts, there
are no issues.


Changing studs
is simply a matter of removing the hubs, pressing or carefully
hammering out the old studs, and pressing in the new
studs. These studs are too long to fit them without removing
the hubs, and besides, installation is much better with the hubs off
the car. At
the front, unbolt the brake calipers and move them out of the way,
remove the center dust caps and the wheel bearing retaining nuts and
remove the hub and brake disc subassemblies. Then, separate
the hubs
from the brake discs and carefully press or hammer out the old studs,
press or carefully hammer in the new ones, and reassemble
everything. At
the rear, remove the brake drums and pull the hubs with a “Churchill”
hub puller to make it easy and to protect the hubs from
damage. Borrow one or consider purchasing one yourself (Canley Classics
and Rimmer Brothers
sell them). Once you’ve removed the hubs, you can
press out or carefully hammer out the old studs and carefully press or
hammer in the new ones--being careful not warp the hubs--and reinstall
the hubs on the car. A shop manual is good to have if you are
unfamiliar with all of this to help you out with instructions and
torque specs. Note that pressing the new studs into place
before reinstalling the hubs on the car is preferable to pulling each
stud home by torquing down hard on a nut and a stack of
washers. You don’t want to risk overstressing or
otherwise damaging your new studs, even though they are pretty strong
and a lot stronger than the thinner stock studs. Pressing
studs out and in is easy enough using a vise and some deep
sockets.
With the new size studs, you'll need new, matching thread lug nuts too,
and these are commonly available from wheel suppliers, auto parts
retailers or specialty vendors like Lug
Nut King. A good torque range for nuts on M12x1.5 studs is
66-86 ft-lbs (i.e., 89-117 N-m).
Enjoy your new studs on the road with confidence!